CREATING AND EDITING A DAY
Learn how to create, edit, and modify a day in the BANDIE Management Portal.
UPDATED 25 MAY 2023
Creating a Day
Creating a day is the first step to building your schedule and inputting scheduling data. You must create a day before you can create a show on that day.
To create a new day, click the +CREATE button in the top right corner of the Days screen.
Editing a Day
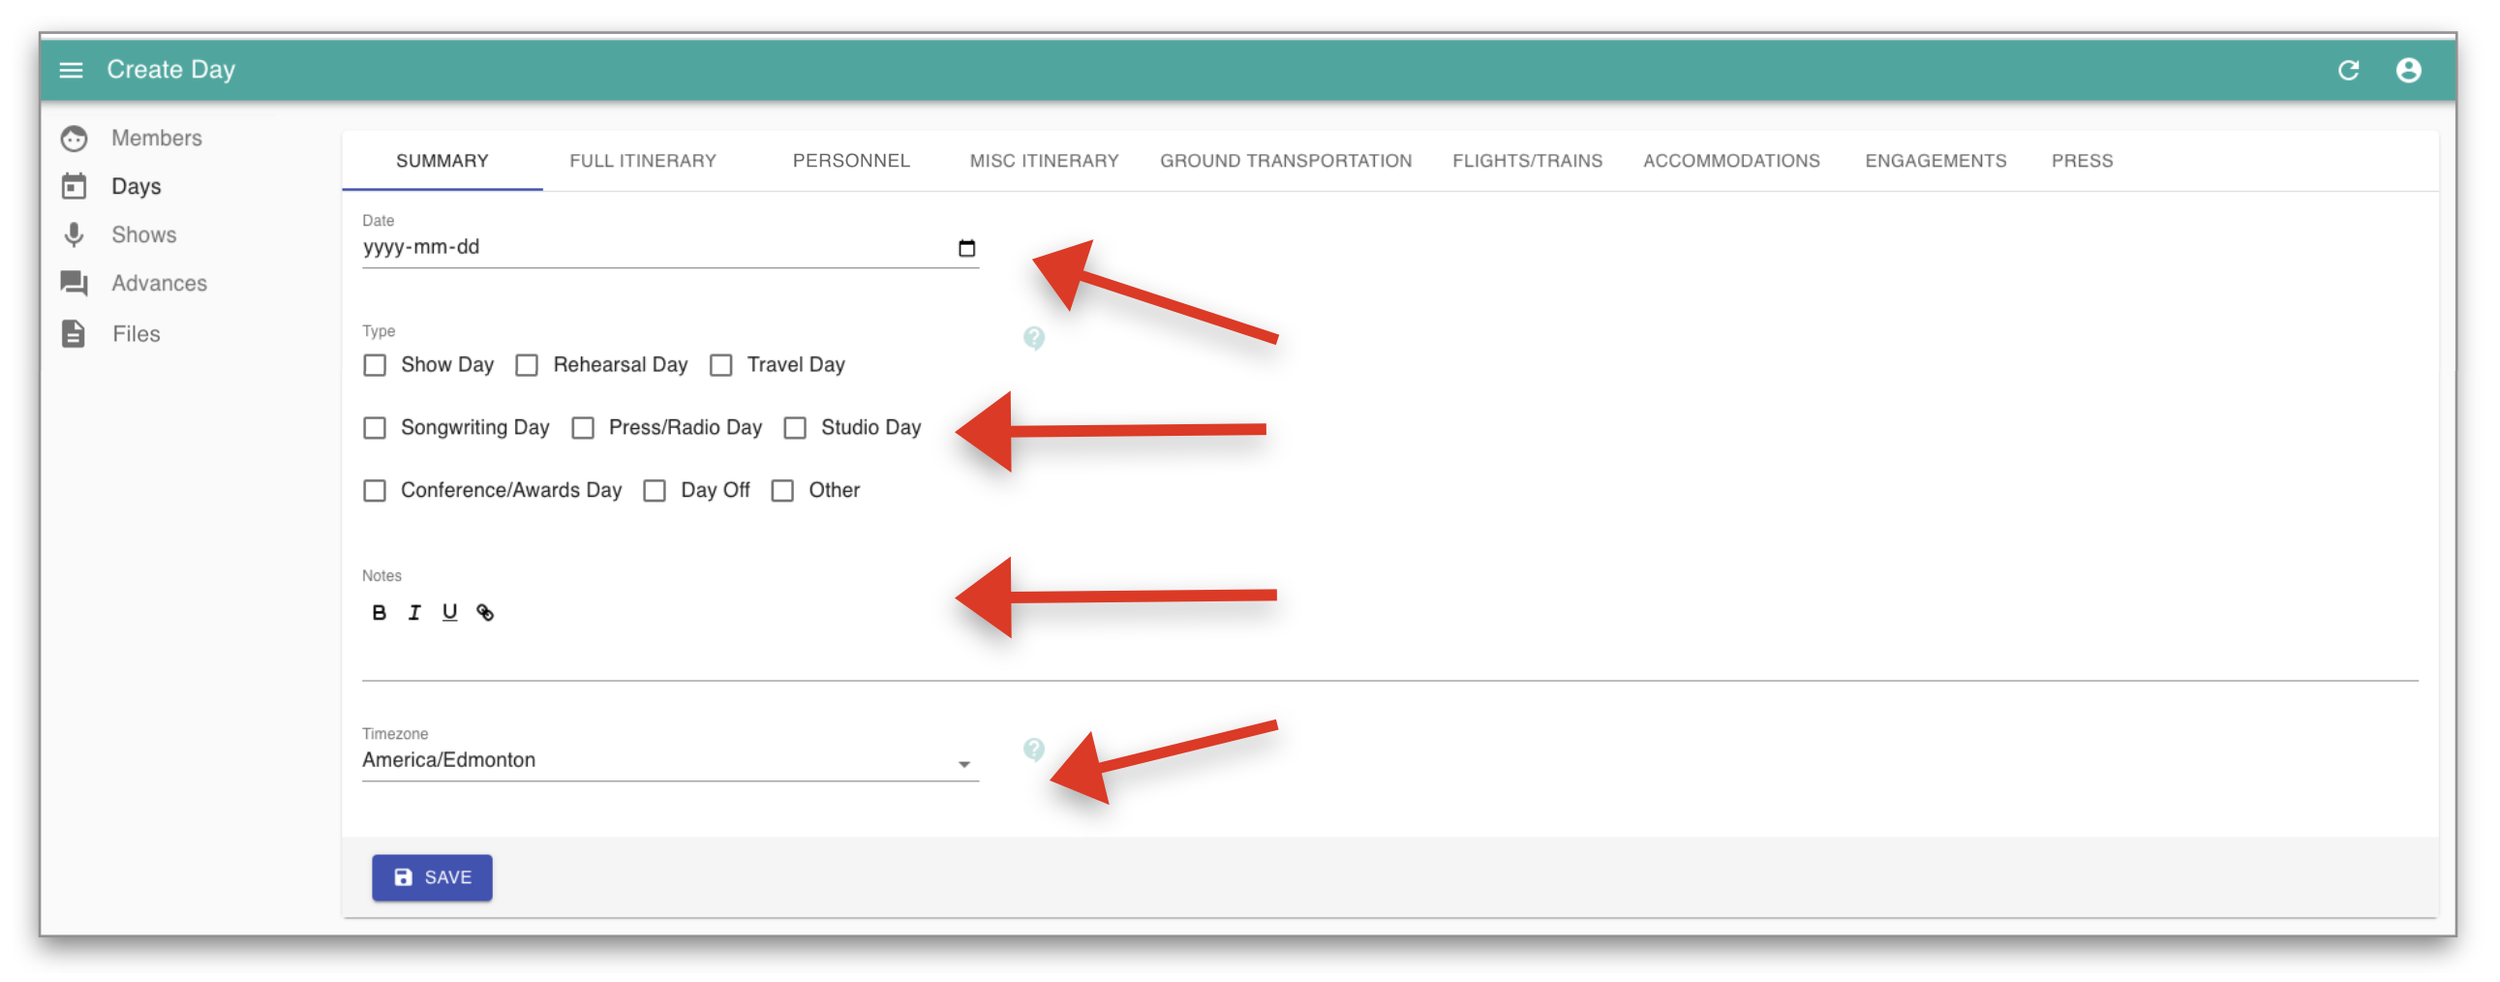
Once you click the +CREATE button, the Day SUMMARY tab will appear. Fill in the Date, what Type of day it is (check all that apply, or use the “Other” check box to personalize your day), any general Notes about that day that are important to share, and Timezone for that day.
TIP: Don’t forget to fill in the Timezone—although you can manually change the time of any event entered, the Timezone entered on the Day Summary page will be the default timezone used throughout that day.
Remember to SAVE your day once you have entered the SUMMARY tab information.
Additional Day data can be entered in the tabs along the Horizontal Menu Bar at the top of the Create Day page:
FULL ITINERARY
You do not need to enter data into the Full Itinerary tab - this tab automatically pulls itinerary-related information from all Day and Show tabs, and combines it into one complete and comprehensive itinerary for the day.
PERSONNEL
Enter your band, crew, and team members into this tab. Use the Booked toggle to mark whether or not band/crew/team members have been booked/confirmed.
You can use the field beside the Booked toggle to add any useful notes on the booking - for instance, who confirmed the member and when.
TIP: For a member to appear in the PERSONNEL dropdown menu, you must add personnel to the Members page, which can be accessed in the left sidebar menu of the Management Portal. See Getting Started - The Management Portal to learn how to add members.
MISC ITINERARY
Use the MISC ITINERARY tab to enter any miscellaneous itinerary items (ie. lobby calls, personnel pickups, etc.) that do not fit or have not been entered into any other event-entry tabs.
GROUND TRANSPORTATION
Use the GROUND TRANSPORTATION tab to enter any vehicle rentals, shuttles, or personal vehicles that you will be using that day.
FLIGHTS/TRAINS
Use the FLIGHTS/TRAINS tab to enter any flight or train bookings that you have that day.
ACCOMMODATIONS
Use the ACCOMMODATIONS tab to enter any accommodations bookings that you have that day.
A NOTE ON EVENTS/BOOKINGS SPANNING MULTIPLE DAYS: Vehicle rentals, flights, and accommodations often span a number of days. Multi-day bookings or reservations only need to be entered once, on any day within the booking range. As long as the start and end dates have been indicated, BANDIE will auto-fill the reservation/booking data throughout the entire date range.
ENGAGEMENTS
Use the ENGAGEMENTS tab to enter meetings, songwriting sessions, rehearsals, or any other important events.
PRESS
Use the PRESS tab to enter all press engagements: TV appearances, interviews, radio visits, etc.
TIP: When entering any event, you have the option to add personnel. Adding someone to an event means that event will show up in their personalized itinerary, and they will receive push notifications for that specific event.
In order for someone to appear in the dropdown menu for an event, they must be entered into the PERSONNEL tab on the day that event occurs.
Remember to SAVE each tab after entering data.
To see a list of all created days, click Days in the left sidebar.
To go back in and edit a day from the Days list view, click the EDIT button to the right of the day you would like to edit.
Duplicating a Day
Instead of building a day from scratch, you can duplicate an existing day to use as a starting point. This can be helpful if you have a weekly recurring gig, or just want to use a previously-built day as a template for a new one. Use the Clone feature duplicate one day’s information to new different day.
To duplicate a day, click the +CLONE button to the right of the day you would like to duplicate. When the pop-up window appears, select a new date to copy all the cloned information to
.
Modifying/Removing a Day
Once a day is created, it may not be deleted or removed. However, there are two ways to modify a day if the current day is no longer needed:
Change the type of day on the Day SUMMARY page to “Day Off”:
2. Change the Date field on the day’s SUMMARY page to a new/different day:


